Flash File: Xmobile X3
We make travel easy for Travelers, Students, Digital Nomads and Travel Agents
We have helped more than 1 000 000 travellers and 200+ Travel and Visa agents
Flight Reservation
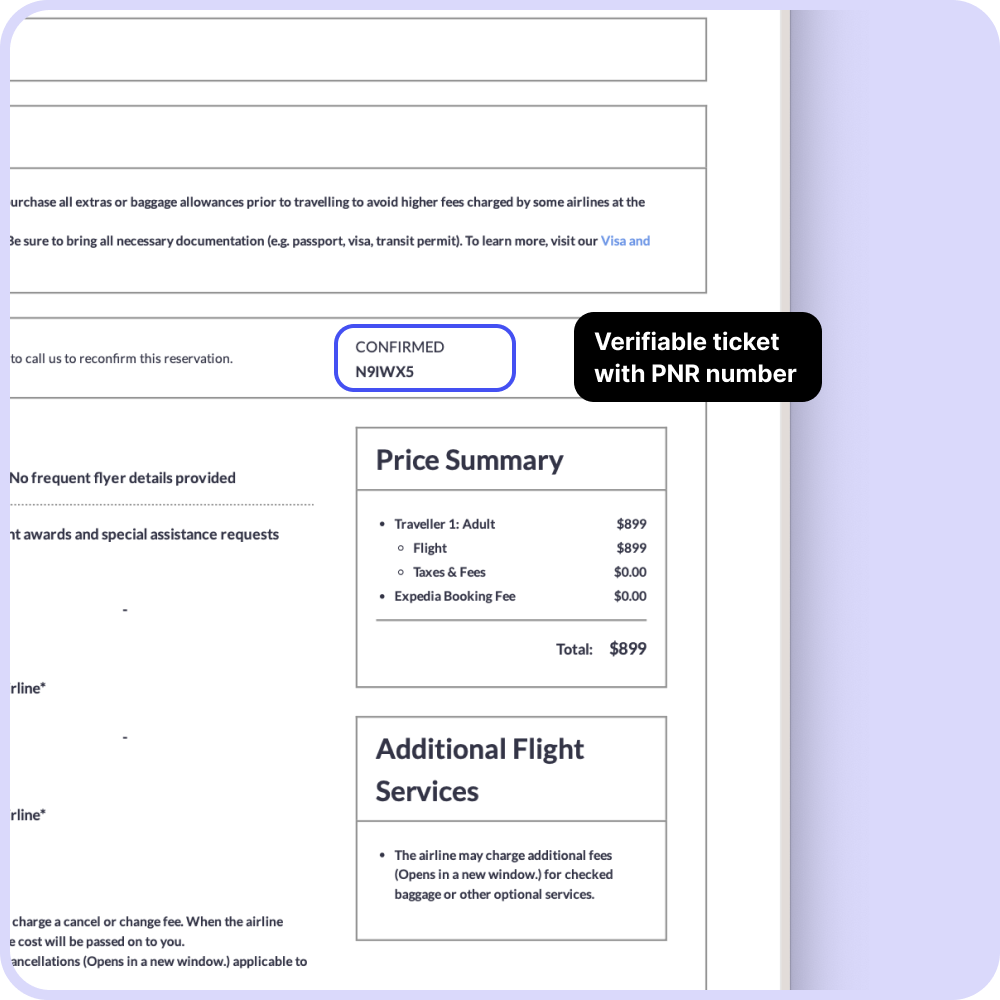
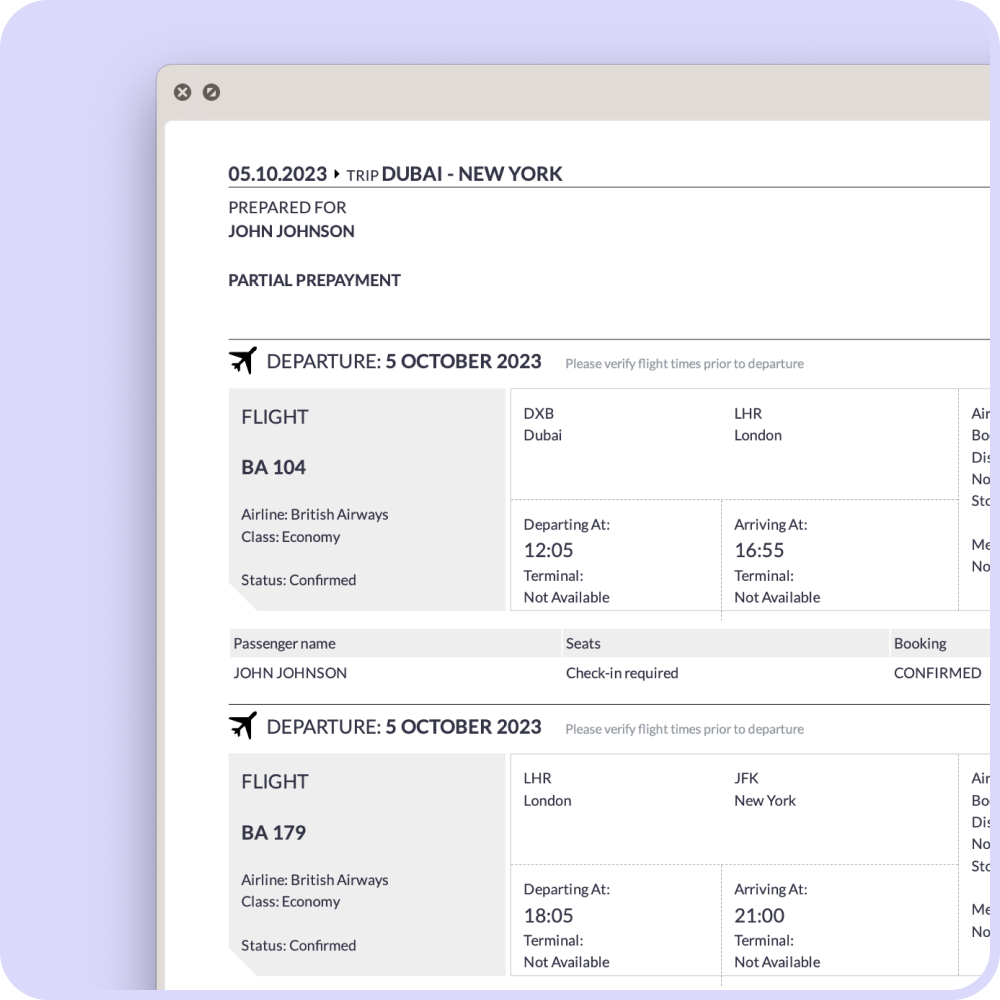
Flight bookings with a verifiable PNR number can help travelers obtain a visa and enter a country. The PNR is a unique identifier that can verify a ticket has been booked and show proof of plans to leave the country. This can help make entry into a country stress-free.
Reservation can be checked on the airline's website or GDS, such as checkmytrip.com or viewtrip.travelport.com
- Verifiable ticket with PNR number
- Reservation code will be valid for a maximum of 14 days
- One ticket may include up to 4 passengers
- You will receive your ticket within 24 hours
Get Flight Reservation
Sample ticket
A sample/onward/dummy ticket is a ticket for a future flight. It looks like a real ticket, but it does not have a PNR code, meaning it is not verifiable.
- Instant flight ticket creation
- With a flight price on a ticket
- Non verifiable ticket
Try for Free
Examples of usage
Travel Visa
Onward Ticket
Business Trip Confirmation
Travel Agency
Travel Visa
In many cases, a flight reservation is an important aspect of the visa application process, as it can provide evidence that you have concrete plans to travel. By having a flight reservation, the issuing authority can better assess the applicant's intent to travel, as well as their ability to pay for the flight and other related expenses. Ultimately, a flight reservation can be a useful tool for visa applicants, as it can help demonstrate their commitment to traveling and complying with visa regulations.
Onward Ticket
It's a common requirement, and many countries require travelers to present a flight reservation or ticket for their onward journey when they arrive. This helps to demonstrate that the traveler has the financial means to pay for the journey and that they have a definite plan for their stay. It can also help authorities feel more secure in the knowledge that the traveler will not overstay their allotted time in the destination country.
Business Trip Confirmation
It's a common requirement that many organizations have when booking a business trip, as they want to make sure that you are actually scheduled to fly and that you will be present for the duration of the trip. Having a flight reservation is a way of providing this confirmation and is often used in the process of obtaining a visa or other travel documents. It's important to keep in mind that having a flight reservation does not guarantee you a seat on the flight, and you may still need to purchase a ticket to board the plane.
Travel Agency
Our team of experts will work with you to ensure that your clients' flight reservations are confirmed and guaranteed, giving you the peace of mind that comes with a successful visa application. Our fast and efficient service means that you can quickly and easily secure the flight reservations you need, without any hassle. Special prices coming soon.
Flash File: Xmobile X3
Flashing will erase all user data (contacts, photos, messages) on your phone. Back up your files to a computer or cloud service first.
Having the correct Xmobile X3 flash file is an invaluable tool for any owner of this device. It empowers you to resolve complex software issues, from persistent boot loops and forgotten patterns to malware infections and general sluggishness. By following the detailed steps outlined in this guide—from backing up your data and installing the right drivers to carefully using the SP Flash Tool—you can confidently restore your device to peak performance. With a bit of patience and attention to detail, using the Xmobile X3 flash file can save you the time and expense of a professional repair, breathing new life into your trusted smartphone.
Click the Load Packet button (usually a gear icon). Navigate to your firmware folder, select the package file ending in the .pac extension, and wait for it to load. Step 5: Begin the Flashing Process
: Clears forgotten privacy passwords, phone locks, or PIN codes.
For MediaTek chipsets: Download and install . Xmobile X3 Flash File
You want to remove custom firmware and return to the stock state. Prerequisites Before Flashing
Incorrect or unsigned USB drivers, or a faulty USB port.
Before beginning the installation process, complete these preparation steps to prevent permanent damage to your device:
Extract the downloaded driver package on your PC. Run the setup file as an administrator and follow the on-screen prompts to complete the installation. Restart your computer to ensure the drivers load correctly. Step 2: Extract the Firmware and Flash Tool Flashing will erase all user data (contacts, photos,
Remember: Flashing is safe when done correctly, but one wrong click can turn a soft brick into a hard brick. When in doubt, consult a professional technician or visit an authorized Xmobile service center.
Try these:
Fixes frequent "App Has Stopped" errors and system stability problems. Core Specifications and Firmware Technical Details
Fortunately, you can restore your device to its factory state. You just need the correct Xmobile X3 flash file (stock ROM) and the appropriate flashing tools. It empowers you to resolve complex software issues,
: Bypassing forgotten screen locks or PINs.
Unplug the phone, perform a hard pull on the battery if removable, restart the tool, and try holding a different button combination when plugging it back into the PC. Final Words & Maintenance
A loose connection during firmware installation can permanently hard-brick your phone.
: Click the Start Downloading (play icon) button in the tool. Connect Device : Turn off the Xmobile X3 completely.
What our customers say
MESSAGES
Andrea Botez
I made a reservation for $21,90. There were no problems with this ticket at the border control.
MESSAGES
Anna Darovski
Very fast in delivering services ⚡
MESSAGES
Marijana
Hi, I bought a ticket on this site 2 days ago. The guys helped to make a difficult reservation, although they warned that the reservation could only work for a couple of days.
MESSAGES
Artem Svirchevskiy
Everything went amazing! I wasn't too nervous when an airline employee checked the return ticket by checking my booking number. I was flying to Thailand before Christmas and didn't want to get stuck at such a crazy time when tickets cost overprices. Booked on a key flight for just $21,90, and it's worth it. Thanks to the service and its creators.
Flashing will erase all user data (contacts, photos, messages) on your phone. Back up your files to a computer or cloud service first.
Having the correct Xmobile X3 flash file is an invaluable tool for any owner of this device. It empowers you to resolve complex software issues, from persistent boot loops and forgotten patterns to malware infections and general sluggishness. By following the detailed steps outlined in this guide—from backing up your data and installing the right drivers to carefully using the SP Flash Tool—you can confidently restore your device to peak performance. With a bit of patience and attention to detail, using the Xmobile X3 flash file can save you the time and expense of a professional repair, breathing new life into your trusted smartphone.
Click the Load Packet button (usually a gear icon). Navigate to your firmware folder, select the package file ending in the .pac extension, and wait for it to load. Step 5: Begin the Flashing Process
: Clears forgotten privacy passwords, phone locks, or PIN codes.
For MediaTek chipsets: Download and install .
You want to remove custom firmware and return to the stock state. Prerequisites Before Flashing
Incorrect or unsigned USB drivers, or a faulty USB port.
Before beginning the installation process, complete these preparation steps to prevent permanent damage to your device:
Extract the downloaded driver package on your PC. Run the setup file as an administrator and follow the on-screen prompts to complete the installation. Restart your computer to ensure the drivers load correctly. Step 2: Extract the Firmware and Flash Tool
Remember: Flashing is safe when done correctly, but one wrong click can turn a soft brick into a hard brick. When in doubt, consult a professional technician or visit an authorized Xmobile service center.
Try these:
Fixes frequent "App Has Stopped" errors and system stability problems. Core Specifications and Firmware Technical Details
Fortunately, you can restore your device to its factory state. You just need the correct Xmobile X3 flash file (stock ROM) and the appropriate flashing tools.
: Bypassing forgotten screen locks or PINs.
Unplug the phone, perform a hard pull on the battery if removable, restart the tool, and try holding a different button combination when plugging it back into the PC. Final Words & Maintenance
A loose connection during firmware installation can permanently hard-brick your phone.
: Click the Start Downloading (play icon) button in the tool. Connect Device : Turn off the Xmobile X3 completely.